In the last tutorial, I promised to show you some of the ways in which you can use the Noise Oscillator in Thor to generate a range of sound effects, and that’s what we’re going to discuss in a moment. But before that, I have to fulfill a promise to the chaps at Propellerhead to explain how I generated the final sound in the last tutorial. It’s reproduced here as sound #1 :
The answer is remarkably simple: I added a Comb Filter to the Sirens patch, as shown in figure 1. The “notes” that you hear in the sample are not generated by pressing different keys on a MIDI controller keyboard; they are determined by the position of a knob: in this case, the cut-off frequency of the comb filter. When the peaks of the comb filter are in the right positions, they accentuate the harmonics of the tuned noise generators in the Sirens sound so you hear musically related notes and, with just a little practice (very little, in fact it took me just 10 minutes or so), I found that I could “play” melodies and create all manner of effects by holding down a couple of notes and then sweeping the FREQ to the appropriate positions.
Mind you, if you try to recreate this on a PC or Mac alone, you’ll find that it’s quite hard. I was unable to master the technique using a mouse or track-pad, but when I mapped one of the knobs on my Korg MS20iC USB controller to Thor’s Filter 1 cut-off frequency, I was able to create some excellent effects. Of course, you don’t need the Korg keyboard to do this; any physical controller with a suitable knob will allow you to do the same.
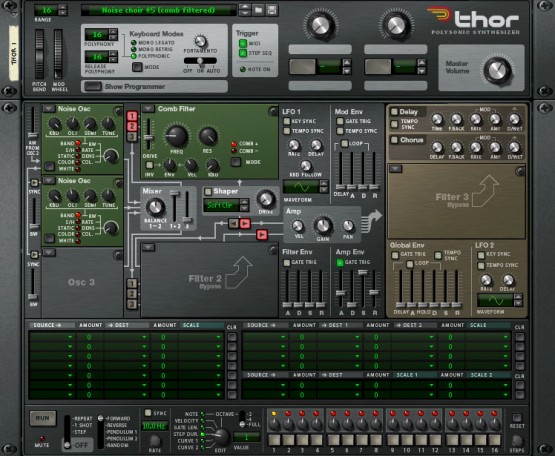
Figure 1: Tuned noise patch with comb filtering
(Click to enlarge)
Back to the early 70s
OK, having sorted that out, let’s now turn our attention to the broad and intriguing area of noise-based sound effects. If you jump into the Reason time machine (it’s the same model as I used for many years at Sound On Sound) and travel back to the early 1970s, you’ll find that – even in the early days of synths – the method of using filtered noise to generate a range of ‘natural’ sounds was well established.
Tom Rhea’s highly respected book of Minimoog sound charts offered patches with self-explanatory names such as Jet Plane, Surf, Thunder, and Wind, while the ARP2600’s patch book offered more complex delights including Clapping Thunder, Mother Whistler, Water Drops, and the long-forgotten Stereo Chickadee Conversation! All of these patches shared one thing in common: they were based on nothing more than the output from the synth’s noise generator, shaped using a filter, some envelopes, and (in the case of the ARP2600 patches) the occasional application of some of the more esoteric voltage control modules.
Unfortunately, we don’t have space here to investigate all of the ideas contained within the Moog and ARP patches, but I’m going to show you how we can create two of the most common noise effects – wind, and waves – and then combine them in Thor to create a sound that, for me, evokes images of strange, alien shorelines. (Cue ‘The Hitchhikers’ Guide To The Galaxy’ “That sunset! I’ve never seen anything like it in my wildest dreams. The two suns! It’s like mountains of fire boiling into space” and so on.)
Hmm before I get too carried away, let’s return to Earth, and start by invoking the Sirens patch from tutorial #5, with the RV7000 reverb still in place, but without the comb filter. (See figure 2.)
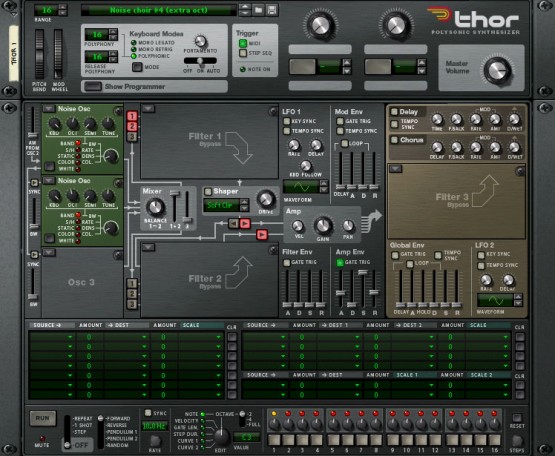
Figure 2: Bottled Sirens
(Click to enlarge)
Generating broadband noise
As you may remember, this uses tuned noise to create an aetherial vocal timbre. But for wind and waves, we do not want tuned (i.e. pitched) sounds; broadband noise* is much more suitable as the starting point for these. Thor’s Noise Oscillator provides many ways to obtain this type of noise, and all five Noise Waves (Band, S&H, Static, Color and White) can be used, but I’m going to stick with the Band option, and reduce the amount of tuning to create a sound that is much closer to white noise*. I do this by increasing the Noise Mod parameter contained within each of the oscillators. In the case of Osc1, I’m going to increase it to a value of 99, which generates broadband noise with a slight tonal quality while, for Osc2, I’m going to turn the knob fully clockwise, thus increasing the Mod all the way to 127 so that its output is, essentially, white. Figure 3 shows the modifications I’ve made, and the sound that this generates is captured in sound #2 :
* For an explanation of terms such as broadband noise and white noise, please refer back to tutorial #5.
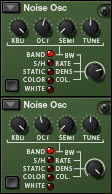
Figure 3: Generating broadband noise
Shaping waves
I now want to shape this to simulate the sound of waves breaking upon a shore, and I’m going to do so by adding a traditional 24dB/octave low-pass filter into the signal path. I’m going to give it a cut-off frequency of around 200Hz, lots of input (“drive”) level, and a slowly opening and closing envelope defined by the A and D settings in the Filter Env panel. The result of this is that, at the start of the sound, only low frequencies are allowed through. Then, as the filter opens, more and more high frequencies are passed. Finally, as the filter closes, only low frequencies are passed again. While hard to describe in words, the effect of the AD contour is immediately apparent when you listen to sound #3 . (The eagle-eyed among you will have noticed that I have also extended the Amp Env to create a long, slow amplitude envelope. The reason for this is, I hope, self-evident.)
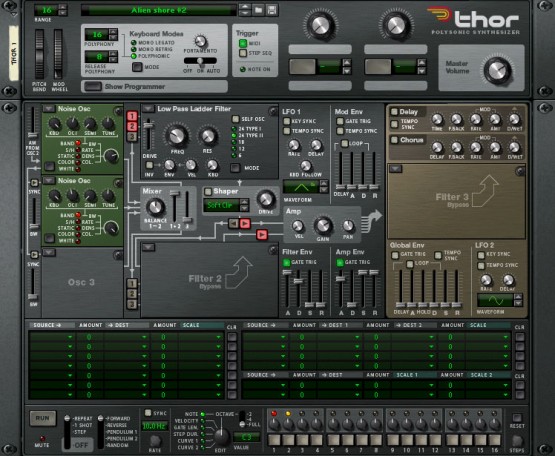
Figure 4: A single wave
(Click to enlarge)
Breaking waves
I find this sound to be very intense and, due to the slightly grainy nature of the Noise Osc, it is already starting to assume some of the character of a wave breaking on a seashore. However, there’s a huge amount of low frequency energy present and, if you have large speakers, you’ll hear a deep rumble within the sound. You may like this (it would certainly have the desired effect in a science-fiction movie seen in a large cinema) but I think that it is a bit excessive, so I’ve decided to tame it by inserting a high-pass filter into the Filter 3 slot. The HPF in Thor’s State Variable Filter is not particularly steep (it has slope of 12dB/octave) so I have chosen a relatively high cut-off frequency of 500Hz or thereabouts. The effect of this is obvious, and you can hear the result in sound #4:
If you feel that this is a little extreme, you can adjust the cut-off frequency downward to attenuate the low frequencies to the degree you feel appropriate.
To complete the first part of the sound, we now need to make sound #4 repeat in a sensible fashion, so that the synthesised waves continue to crash against the shore. There are many ways to achieve this, but I’m going to do so by invoking Thor’s step sequencer. It’s not apparent from the screen shot (see figure 5) how this is set up, so here’s the explanation:
The sequence has two steps and is running at 0.1Hz, so each step is in principle 10 seconds long. However, I have set the duration of the second step to 1/2, so this lasts just 5 seconds, and I have also set it up so that it does not send a trigger to the rest of Thor. I therefore have a sequence that last 15 seconds, the first 10 with the sound triggered (with a Gate duration of 75%), and the next 5 with only the delay and reverberation generated by the RV7000 present. (Note: If you play this patch without the reverb switched on, you will hear that the sound stops dead when the Gate is closed by the sequencer. The RV7000 is therefore an important component of the program, not just a reverb in the conventional sense.)
You can, of course, adjust all of these timings and parameters to taste, but I find that this to be a pleasing result, so let’s view now hear the waves. You can almost hear the ocean draining back across the shingles!
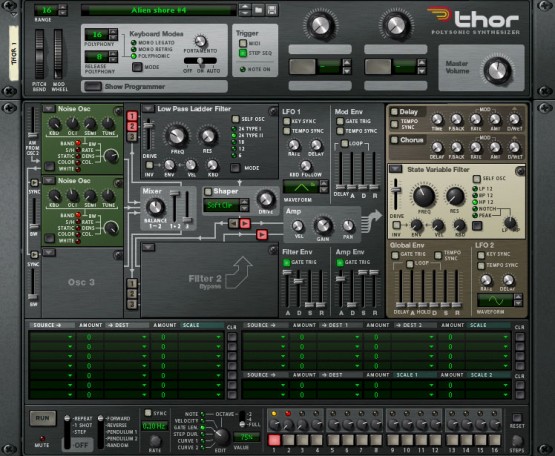
Figure 5: Waves breaking
(Click to enlarge)
Adding more elements
Interesting though this sound is, it’s not very realistic, even for an alien shoreline lying somewhere in the unfashionable arm of the Milky Way. (Oops… there I go again.) If you live in England, you’ll know that there’s no such thing as summer, and any experience of the seaside is accompanied by a biting wind that seeks to strip the flesh from your bones unless you wear a thick vest and a ski jacket. So the next stage is to generate a wind effect using the second signal path that Thor provides.
Let’s switch off the signal path from the oscillators to Filter 1 by clicking on the “1” and “2” buttons within the filter itself, and then launch a second 24dB/octave low-pass filter in the Filter 2 slot. I have done this as shown in figure 6, with the filter’s cut-off frequency set to around 600Hz, its resonance set to 100 or thereabouts, and a fairly low drive level. Routing the oscillators to this filter results in sound #6 , which is another example of tuned noise, not dissimilar to the timbres that I created in the previous tutorial.

Figure 6: Tuning the wind sound
Although the underlying timbre is appropriate, sound #6 is static (which wind is not) so I now need to modify the patch to create some movement. This is easy. Firstly, I use the modulation matrix to direct the output of LFO1 to the Filter 2 cut-off frequency. I don’t want a cyclic sweep (which would be boring) so I choose one of the quasi-random waveforms. This stops the wind effect from cycling in synchronisation with the waves, so the composite sound doesn’t repeat in an obvious fashion. Secondly, I use the matrix to direct the output of Filter 2 directly to Audio Out 1 so that the wind sound can be heard without interruption, no matter what else might be happening. The resulting patch is shown in figure 7, and the sound that it generates is now much more evocative:
(It’s worth noting that we could generate this sound using a third noise oscillator in Band mode, with the tuning increased, and that we could then modulate this directly without invoking a second filter to create the wind effect. The benefit of my approach is that it leaves an oscillator slot free so that I could, if I wished, insert a different type of oscillator to increase the complexity of the sound or even to change its nature altogether. There are numerous ways to create this type of patch, and no ‘wrong’ ones.)
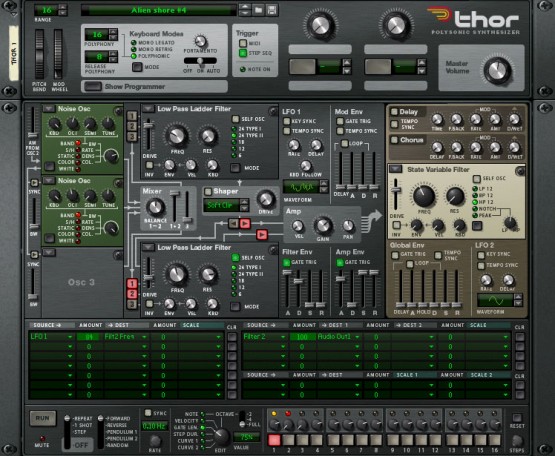
Figure 7: Adding a wind effect
(Click to enlarge)
So now we have waves crashing on a shoreline (courtesy of the signal routed through Filter 1) and wind whistling around us (courtesy of the signal routed through Filter 2). To create our alien soundscape we need only add these two elements together by reactivating the audio inputs to Filter 1. (See figure 8.) If you ever wanted to become a sound designer for the next incarnation of Star Trek, you could do worse than to start with sound #8 , which is just a short snippet of the endless crashing of the waves and howling of the wind that this patch generates.
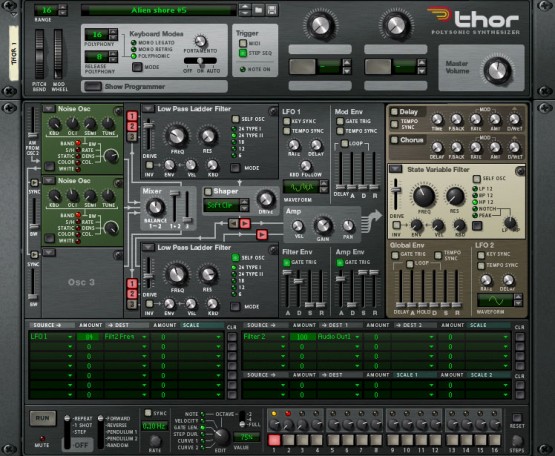
Figure 8: Standing on alien shores
(Click to enlarge)
The possibilities are endless
Of course, there are many changes and embellishments that you make to this sound. For example, the rigorous tempo of the wave effect becomes tiring if you listen to it for too long, so you could add a degree of randomness to this. In addition, you could modulate the loudness. You could also connect the cut-off frequency and resonance of Filter 2 to a pair of knobs so that you could adjust the wind effect in interesting ways. And, as you would expect, there’s a huge range of alternative timbres that you could produce by adjusting the other parameters of the sound. You could spend time making it more realistic (in the sense of standing on a weather-beaten cliff in Scotland) or develop it further in more experimental ‘alien’ ways. The possibilities are endless.


