
It was a long and winding road, but Reason has finally been armed with a tool that lets you build your own Frankenstein’s monster out of the existing devices. The Combinator unleashes the full power of Reason and fulfills the promise set forth by the “workstation” label. For it has long been a staple of the hardware workstation paradigm that you can combine single patches into superpatches tailored for different needs such as live performance splits or giant stacked pad sounds. But in the hardware world, combining sounds usually entails some nagging limitations – the most obvious of these being that the integrity of a single sound is compromised once you move into the multi-timbral domain, where the fixed set of onboard effects suddenly goes from local to global. This invariably leads to those single sounds losing some of their power, all depending on how heavily they relied on the effects. Not so with the Combinator, where each combined sound lives in its own microcosm and one sound doesn’t need share any resources with another. Well… apart from the CPU. You can’t have it all!
Combination of One
Before we lose ourselves in outrageously elaborate power-user routing exercises, we’re going to focus on a simple theme: How can the Combinator bring something new out of one particular device? In a two-part article we will build four fairly simple Combinators dedicated to four different Reason devices, and see how the Combi can improve upon these devices by extending their functionality, both through the Combinator itself and through whatever supporting devices can make the device more powerful. Deluxe versions of the original devices, if you will; useful allround-Combinators which are task based rather than sound based.
One of the fun things about the Combinator is that it lets you redirect CV signals to parameters that are normally not accessible via CV. This lets you control virtually any parameter via CV – to name but one example, the waveform selection on the Subtractor (we will get to that in part II) and the Step parameter of the DDL-1 delay. And of course, CV/Gate has always been a favorite here at the Discovery camp – it’s one of those things that make Reason special, something you can tinker with in your proverbial garage. And now with the Combinator you can even do custom paint jobs. Without a safety mask, even.
OK. Less talk, more action.
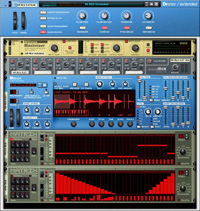
Dr. REX / Extended

Since Dr.REX is a device which doesn’t save and load patches, it will always default to certain settings when created – settings which you may or may not agree with. After creating a Dr. REX you may often find yourself routinely activating high quality interpolation and LFO sync, adjusting the volume, adjusting the velocity amp setting, the pitch bend range, filter and amp envelope, LFO settings and so on. By simply placing an empty Dr.REX inside a Combinator and saving that Combinator patch, you will have quick access to a Dr. REX with all the default settings just how you like them…!
In this Combinator we will also supply the Dr. REX with a couple of useful assistants, namely two Matrix sequencers: One for sequencing the pitch, the other for modulating the parameter of your choice. We will also add an MClass Maximizer as a quick remedy for loops that are too low or uneven in volume and you don’t have time to fiddle with levels.
The pitch sequencer is based on a method described in the very first Discovering Reason article, entitled Ask Dr. REX!. The basic idea is to use a Matrix sequencer to control the pitch. This eliminates the process of editing the pitch of each individual slice, which can be a tedious task. The alternative method used here allows you to simply draw in notes in the Pitch sequencer Matrix. This is useful not only for instrument and vocal loops, but for drum loops as well. For example, this simple sequence will pitch up the snare drum by an octave on any loop that features snare hits on the 2 and the 4.

Here’s what we need for this Combinator:
- 1 Line Mixer 6:2
- 1 Dr. REX
- 1 MClass Maximizer
- 2 Matrix sequencers
Audio routings
The Dr. REX stereo output goes to the first channel on the Line Mixer. The main out from the mixer is connected to the input on the MClass Maximizer, and the Maximizer’s stereo output is routed to “From Devices” on the Combinator. Simple as that.
CV/Gate routings
Connect the Note CV output of the first Matrix sequencer (the one for controlling the pitch) to the OSC Pitch input on the Dr. REX, and turn the CV adjustment knob (next to the OSC Pitch input) full right. Connect the Curve CV output of the second Matrix sequencer to any of the modulation inputs on the Dr. REX – in the following demonstrations we will use both the Level and the Filter 1 Cutoff inputs.

Rotaries
Nothing fancy here, we will simply use the rotary controls to substitute for a selection of controls on the Dr. REX front panel. The first will control Filter frequency, the second will be assigned to Filter envelope amount. The third will be a Transpose control and the fourth will control LFO amount.
Buttons
The first button will toggle the Maximizer between On and Bypass mode. The second will act as an on/off switch for the Filter. The third will enable/disable pattern playback on the Matrix sequencer controlling the pitch, and it will simultaneously shift the Dr. REX pitch by two octaves in order to compensate for the Note CV signal offset (for more on this, see the “Ask Dr. REX!” article). The fourth button will enable/disable the Matrix sequencer responsible for additional modulation.

Combinator Programming
Most of the programming required here deals with the Dr. REX, of course.
For Rotary 1, select Filter Freq from the menu and leave the values at Min: 0, Max: 127. Select Filter Env Amount for Rotary 2 and use the default values. Rotary 3 is the Transpose control and should be set to Min: -12, Max: 12. Rotary 4 is the LFO Amount control – again, use the default values.
Button 2 is the Filter on/off switch, and values should be Min: 0, Max: 1. Finally, Button 3 is the one that toggles the whole Pitch Sequencer thing on and off, so it will control both a Matrix Sequencer and the ‘Osc Octave’ parameter on a Dr. REX. It should be set to Min: 4, Max: 0. Why? Because when the Pitch Sequencer kicks in, the modulation CV signal will offset the pitch by 4 octaves so the Dr. REX must compensate for this.
OK, that’s the Dr. REX, but there’s a couple more things to do in the programmer.
Bring up the Modulation Routing for the MClass Maximizer and assign the parameter ‘Enabled’ to Button 1. Values should be Min: 2, Max: 1. This means that when the button is in the Off (Min) state, the Maximizer will be in Bypass mode, and the On (Max) state will put the Maximizer in On mode.
Finally, there’s the two Matrix sequencers. For the first one, assign the parameter Pattern Enable to Button 3 (Min: 0, Max: 1). For the second Matrix, do the same for Button 4.
The finished Combinator should look like this: dr_rex_extended.cmb (custom skin included). Now let’s look at a couple of examples of the Dr.REX/Extended in action.
rex_pitchdemo.rns – Here we’ve taken three different guitar loops (one acoustic, two electric) from the Factory Sound Bank. All three involve strumming a single chord (major) and they have a similar rhythmic feel. Now, with the pitch sequencer onboard, changing the pitch of the chords is a walk in the park – simply draw notes on the pitch sequencer Matrix display, and you have a different guitar loop. Since the Factory Soundbank guitar loops are available in Major, Minor, Cmaj7 and so forth, you can patch together a guitar track for a whole song using 2-3 Dr.REX/Extended and alternating between them – or you can build upon this Combinator even further by adding another Dr. REX and then reprogram a Combinator button so that it mutes one Dr. REX and unmutes the other, allowing you to alternate between two loops with the click of a button.
rex_moddemo.rns – Starting with the above example, we put the secondary Matrix sequencers to use by having each one modulate its Dr. REX in its own way. On the acoustic and one of the electric guitars it modulates the level, resulting in a gate/tremolo-like effect. On the second electric guitar it modulates a resonant bandpass filter, approximating a wah-wah effect. The idea with the Modulator sequencer in this Combinator patch is to have it standing by in case you want to modulate something real quick – level, filter frequency, resonance…
The best way to use these kinds of task-based “template” Combinators is to put them in a separate Favorites list and call it Create, Templates or something to that effect. Then, whenever you want to call up one of them you simply use the ‘Create Device By Browsing Patches’ command, which brings up the browser. There you click on the Favorites list where you keep your template Combinators, and presto – the machine is inserted into the rack.
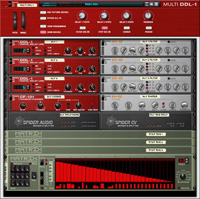
Multi DDL-1

Another device which, through the Combinator, is open for CV control of parameters previously off limits to CV/Gate is the DDL-1. Toying around with the DDL-1 in the past, you may have noticed – by accident or other – that changing the number of steps on the fly while the delay is processing a signal, causes a fun side effect reminiscent of pitch bend. What we’re going to do here is build a multitap delay comprised of three DDL-1 units, and featuring the following additional goodies:
- – Optional Matrix control of the Steps parameter on each of the three delays
- – One ECF-42 filter for each of the delays, optionally controlled by a Matrix
- – Chorus
- – Phaser
This Combinator patch lets you do a number of nifty things. Its most basic function is to serve as a straightforward multitap delay with the option of adding phaser and/or chorus as icing on the cake. The filters let you give the different delay signals different flavors, and the filter sequencer lets you do cool stuff like gradual HF damping.
OK, here’s our shopping list for this baby:
- 3 DDL-1 delays
- 3 ECF-42 filters
- 1 CF-101 chorus/flanger
- 1 Spider Audio
- 1 Spider CV
- 4 Matrix sequencers
Audio routings
No mixer is required here. Instead we route the signal from the Combinator’s ‘To Devices’ to the Splitter input on the Spider Audio. From there we split the signal to each of the three DDL-1 units. We then route the outputs from first DDL-1 to the inputs of first ECF-42 and repeat this for all three pairs of delays and filters. We then route the outputs of the three filters to the Merger input on the Spider Audio. Finally, the merged output from the Spider Audio is routed to the Chorus input, the Chorus output to the Phaser input, and the Phaser output to ‘From Devices’ on the Combinator.
CV/Gate routings
We’ve got no less than four Matrix units here. One of them will be used to control the cutoff parameter on the three filters. The other three will be used to control the Steps parameter on each DDL-1, respectively. So: Route Curve Out from Matrix #1, 2 and 3 to Rotary 1, 2 and 3 on the Combinator. Route Curve Out from Matrix #4 to Split A In on the Spider CV. Route Split A Outputs 1, 2 and 3 to the Freq CV In on ECF-42 #1, #2 and #3.

Rotaries
The three first rotary knobs on the Combinator will be devoted to the Steps parameter on the three delays. When the “Step sequencer” is active, the three knobs are overridden by the three Matrix sequencers doing the automation; however when when the “Step sequencer” is inactive, they can be used for manual control. Incidentally, the dotted scale on the rotary dials corresponds to the number of steps (1-16). The fourth rotary knob will control the global Feedback.
Buttons
The first button will be assigned to Pattern Enable on the “Filter sequencer”. The second button will enable/disable the three Matrix units that control the Step parameters. The third and fourth button will enable/disable the Chorus and the Phaser, respectively.

Combinator programming
For the first DDL-1, assign Rotary 1 to the “DelayTime (steps)” parameter and leave it at Min: 1, Max: 16. Repeat this for the second and third DDL-1, but use Rotary 2 and 3, respectively.
For all three delays, assign Rotary 4 to the “Feedback” parameter and leave it at Min: 0, Max: 127.
Each of the three Matrix units that control the DelayTime (steps) parameter should have the following modulation routing on the Combinator: Button 2 – Pattern Enable – Min: 0, Max: 1.
The Matrix that controls the Filter Sequencer should be routed in a similar way: Button 1 – Pattern Enable – Min: 0, Max: 1.
The three filters should each be routed as follows: Button 1 – Enabled – Min: 2, Max: 1. Meaning that the button which toggles the Step sequencer on and off will also toggle the three filters between On and Bypass mode.
The Chorus: Button 3 – Enabled – Min: 2, Max: 1.
The Phaser: Button 4 – Enabled – Min 2, Max: 1.
The finished Combinator should look like this: multi_ddl-1.cmb. Now let’s see some examples of how to use it.
ddl_stepdemo1.rns – A simple REX drum loop showing off the crazy delay effects you can achieve from the step time automation. The delay is bouncing around all over the place, at times sounding like vinyl scratching. The patterns controlling the delay times are entirely randomized.
ddl_stepdemo2.rns – This one uses programmed patterns that are a little saner (but only a little). It also uses different filter settings for the delays, which makes for some interesting variation.
ddl_filterdemo.rns – The filter sequencer in action, here shown gradually filtering out the high end over the course of two bars.
ddl_pandemo.rns – Here we have simply re-routed some CV signals – by going into the Combinator and changing the target parameter from DelayTime (steps) to Pan, we now have a random(ish) panning for each delay. Chorus and Phaser added for extra sweetening.
That’s all for this issue of Discovering. In part II of the article we will continue with more customized rides, including one entitled “SuperSub”. Have fun!
Text & Music by Fredrik Hägglund


